GPT-5.5 and GPT Image 2 Image APIs
Posted April 25, 2026 by XAI Tech Team ‐ 14 min read
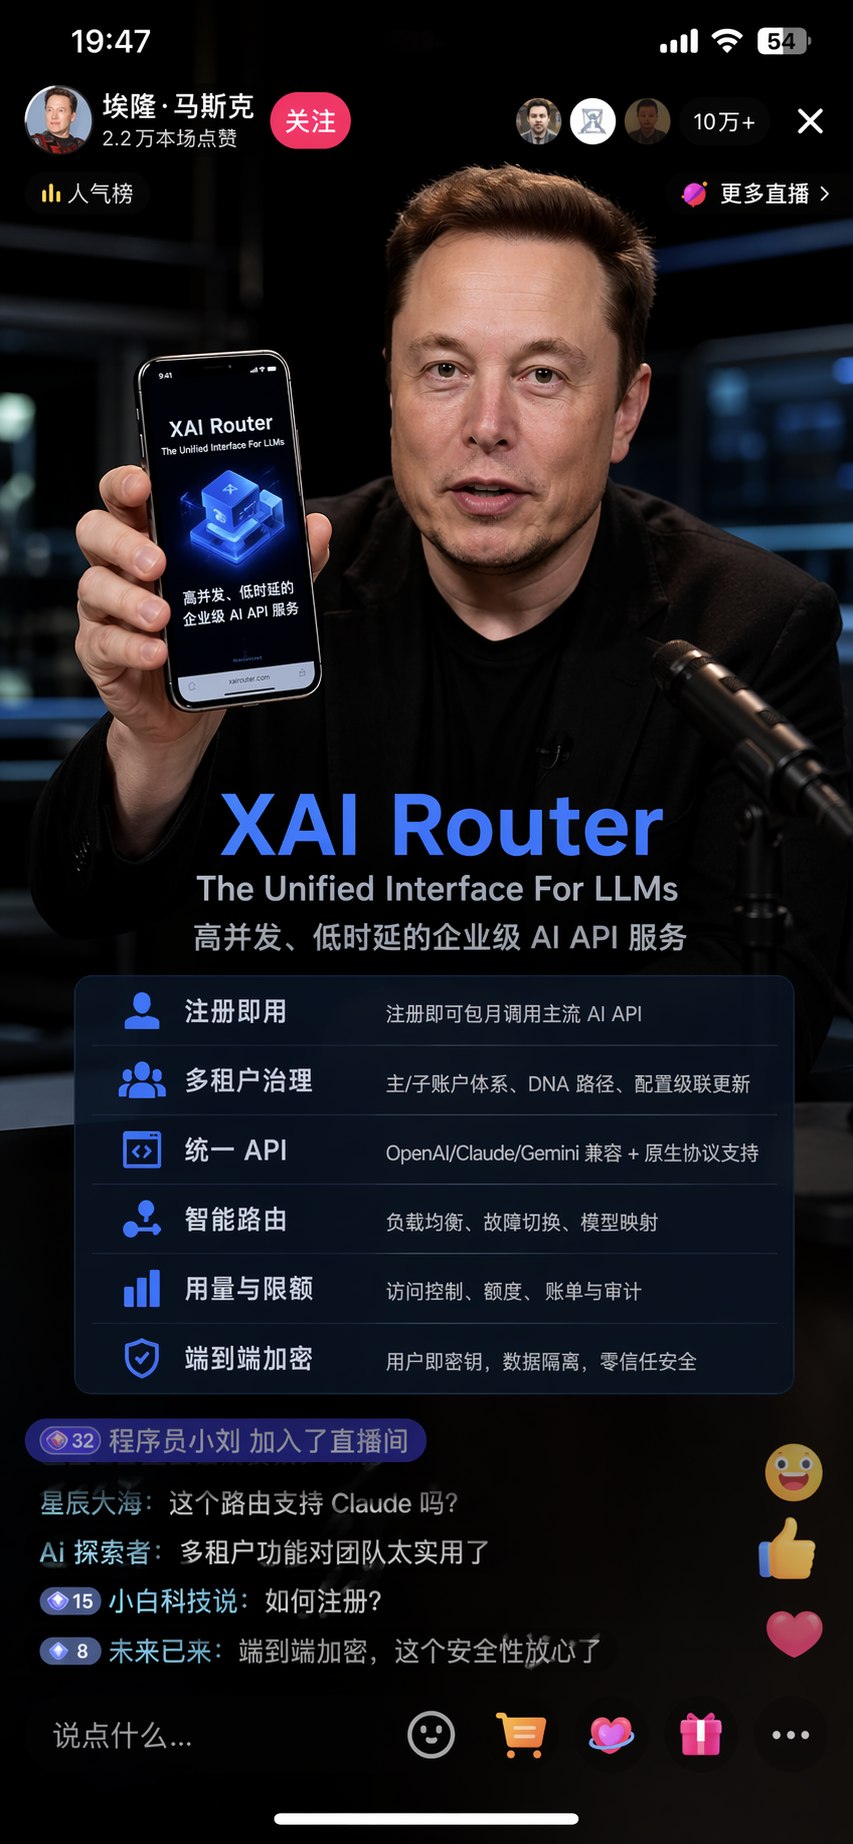
GPT-5.5 is not only useful for text, code, and complex tool use. It can also act as the orchestration model in a multimodal workflow: gpt-5.5 understands the user's intent, then calls the image_generation tool to generate an image with a GPT Image model.
On XAI Router, there are two OpenAI-style entry points:
- Responses API: use
gpt-5.5as the main model and let it callgpt-image-2through theimage_generationtool. - Images API: call
gpt-image-2directly through OpenAI-compatible/v1/images/generationsand/v1/images/editsendpoints.
The core combination is:
- Main model:
gpt-5.5 - Tool:
image_generation - Image model:
gpt-image-2 - Images API:
/v1/images/generations,/v1/images/edits - Base URL:
https://api.xairouter.com - API key environment variable:
XAI_API_KEY
This guide follows the structure of the official OpenAI image generation tool and Images API examples, then adapts the request URL, authentication environment variable, and model selection for XAI Router. You can think of the migration as a small mapping:
| Layer | OpenAI official setup | XAI Router setup |
|---|---|---|
| API Base URL | https://api.openai.com/v1 | https://api.xairouter.com/v1 |
| API key | OPENAI_API_KEY | XAI_API_KEY |
| Main model | gpt-5.5 | gpt-5.5 |
| Image tool | image_generation | image_generation |
| Image model | GPT Image model, such as gpt-image-2 | gpt-image-2 |
The important OpenAI API concepts are: image_generation is a built-in Responses API tool; the tool call result contains a base64-encoded image; gpt-5.5 supports this tool; and the actual image generation is performed by a GPT Image model such as gpt-image-2. If you already use the official OpenAI Images API, you can also point the baseURL at XAI Router and keep calling /v1/images/generations or /v1/images/edits.
XAI Router Tested Capabilities
The results below are based on live tests against https://api.xairouter.com from April 25, 2026 to May 1, 2026, plus a July 18, 2026 revalidation of the updated Images edit path. API behavior can evolve, so production systems should still keep timeouts, retries, and failure logs.
| Capability | Test result | Recommendation |
|---|---|---|
Query gpt-5.5 and gpt-image-2 from /v1/models | Successful, both models are listed | Useful as a startup probe |
Text call with gpt-5.5 through /v1/responses | Successful, status=completed | Good baseline connectivity test |
/v1/responses + image_generation + gpt-image-2 + stream:true | Successful, returned response.completed and base64 image data | Recommended path |
tool_choice: { type: "image_generation" } | Successful, forced the image tool call | Good for fixed "Generate image" buttons |
partial_images through /v1/responses | Successful, but a request for 2 partials may return only 1 | Do not assume a fixed partial count in the UI |
quality:"high" + output_format:"png" | Successful | Useful for final-quality assets |
Non-streaming image generation through /v1/responses | Successful in this test and returned a full image | Usable, but streaming is still preferred |
/v1/images/generations + gpt-image-2 | Successful, returned OpenAI Images API-style JSON with data[0].b64_json | Best fit for OpenAI SDK-compatible integrations |
/v1/images/edits + gpt-image-2 | Single-image multipart revalidation succeeded with HTTP 200, an image, and complete usage | Use for image edits, character continuity, and reference workflows |
Multiple reference images and mask through /v1/images/edits | Supports image, repeated image[], and one mask | Use PNG/JPEG/WebP and validate files client-side |
3840x2160 / 2160x3840 4K output | Successful, decoded JPEG files were confirmed as 3840x2160 and 2160x3840 | Works, but latency and cost are higher than 1024-size outputs |
4096x4096 | Returned HTTP 400 because the longest edge must not exceed 3840 | Do not treat 4K as 4096x4096 |
Given the current XAI Router behavior, there are two recommended paths:
- If you want
gpt-5.5to understand the user request, refine the prompt, or participate in a multi-step workflow, use Responses API +stream:true+image_generationtool +gpt-image-2. - If your client already uses the official OpenAI Images API or only needs to generate/edit a single image, use
/v1/images/generationsor/v1/images/edits+model:"gpt-image-2".
Choosing an API Path
| Path | Endpoint | How to set model | Best fit |
|---|---|---|---|
| Responses API tool call | /v1/responses | Use gpt-5.5 as the main model, and set model:"gpt-image-2" inside the tool | Chat-based generation, multi-turn edits, prompt understanding or prompt expansion by the main model |
| Images API generation | /v1/images/generations | Set model:"gpt-image-2" directly | OpenAI Images API compatibility, text-to-image generation |
| Images API edits | /v1/images/edits | Set model:"gpt-image-2" directly | Uploaded-image edits, reference-image generation, partial modifications |
If your client already calls client.images.generate() or client.images.edit() from the OpenAI SDK, non-streaming requests usually only need a new baseURL and API key. Set the request model explicitly to gpt-image-2 and do not rely on older DALL·E-specific parameter behavior. The direct Images examples in this guide are intentionally non-streaming; use the Responses API when you need streaming progress or partial images.
/v1/images/variations is a common endpoint for older image models, but it is not the recommended path for gpt-image-2. For gpt-image-2, use generations and edits.
All examples below use:
export XAI_API_KEY="your XAI API key"Images API: Generate Images
This is the closest path to the official OpenAI Images API. The request URL is https://api.xairouter.com/v1/images/generations, and the response contains data[0].b64_json.
When image output options are omitted, the current XAI Router Images API defaults to quality:"medium" and output_format:"png", and it does not proactively set output_compression. Only pass output_compression when you choose jpeg or webp and want to control lossy compression.
cURL
curl -sS "https://api.xairouter.com/v1/images/generations" \
  -H "Authorization: Bearer $XAI_API_KEY" \
  -H "Content-Type: application/json" \
  -d '{
    "model": "gpt-image-2",
    "prompt": "Generate a polished square portrait of a professional XAI female AI assistant in a bright futuristic control room. No text, no logos, no watermark.",
    "size": "1024x1024",
    "quality": "high",
    "output_format": "png"
  }' | jq -r '.data[0].b64_json' | base64 -d > xai-assistant.png

file xai-assistant.png
A typical response has this shape:
{
  "created": 1777573692,
  "data": [
    {
      "b64_json": "...",
      "revised_prompt": "..."
    }
  ],
  "output_format": "png",
  "quality": "high",
  "size": "1024x1024",
  "usage": {
    "input_tokens": 123,
    "output_tokens": 456,
    "total_tokens": 579
  }
}
The gpt-image-2 Images API returns base64 image data directly in data[].b64_json, so these examples do not need the legacy response_format field. If you need a URL, decode the image on your backend, upload it to object storage or a CDN, and return your own URL to the frontend. Upstreams may return different supplemental metadata; clients should treat data[].b64_json as the stable image field.
Node.js
import fs from "node:fs";
import OpenAI from "openai";

const client = new OpenAI({
  apiKey: process.env.XAI_API_KEY,
  baseURL: "https://api.xairouter.com/v1",
});

const result = await client.images.generate({
  model: "gpt-image-2",
  prompt:
    "Generate a polished square portrait of a professional XAI female AI assistant in a bright futuristic control room. No text, no logos, no watermark.",
  size: "1024x1024",
  quality: "high",
  output_format: "png",
});

const imageBase64 = result.data[0].b64_json;
fs.writeFileSync("xai-assistant.png", Buffer.from(imageBase64, "base64"));
Python
import base64
import os
from openai import OpenAI

client = OpenAI(
    api_key=os.environ["XAI_API_KEY"],
    base_url="https://api.xairouter.com/v1",
)

result = client.images.generate(
    model="gpt-image-2",
    prompt="Generate a polished square portrait of a professional XAI female AI assistant in a bright futuristic control room. No text, no logos, no watermark.",
    size="1024x1024",
    quality="high",
    output_format="png",
)

with open("xai-assistant.png", "wb") as f:
    f.write(base64.b64decode(result.data[0].b64_json))
Images API: 4K Images
gpt-image-2 supports flexible dimensions, but 4K should follow the official constraints:
- 4K landscape:
3840x2160 - 4K portrait:
2160x3840 - Maximum edge length:
3840 - Both edges must be multiples of
16px - Long-edge to short-edge ratio must not exceed
3:1 - Total pixels must be between
655,360and8,294,400
Outputs above 2560x1440 total pixels are in the high-resolution/experimental range. Use low or medium quality to validate composition first, then switch to 4K and higher quality.
In live tests, both 3840x2160 and 2160x3840 generated successfully. 4096x4096 was rejected:
{
  "error": {
    "message": "Invalid size '4096x4096'. The longest edge must be less than or equal to 3840.",
    "type": "image_generation_user_error",
    "param": "tools",
    "code": "invalid_value"
  }
}
4K generation takes longer. Start with quality:"low" or quality:"medium" for drafts, then raise quality after the visual direction is approved.
curl -sS "https://api.xairouter.com/v1/images/generations" \
  -H "Authorization: Bearer $XAI_API_KEY" \
  -H "Content-Type: application/json" \
  -d '{
    "model": "gpt-image-2",
    "prompt": "Generate a clean 4K landscape image of a professional XAI female AI assistant in a bright futuristic command center. No text, no logos, no watermark.",
    "size": "3840x2160",
    "quality": "low",
    "output_format": "jpeg"
  }' | jq -r '.data[0].b64_json' | base64 -d > xai-4k-landscape.jpg

file xai-4k-landscape.jpg
For portrait orientation, change size to 2160x3840.
Images API: Edit Images
The edit endpoint is /v1/images/edits. The official OpenAI SDK and cURL examples usually send multipart/form-data, which is a good fit for local file uploads. XAI Router sends the input images to gpt-image-2 for editing or reference-image generation.
For gpt-image-2, omit input_fidelity. This model automatically processes image inputs at high fidelity, and the API does not allow manually changing that setting.
For portable multipart edits, send one image or repeated image[] fields, an optional mask, and a required prompt. Use PNG, JPEG, or WebP files. Up to 16 input images and one mask are accepted, with a maximum of 50 MiB per file and 128 MiB per multipart request. Omit the legacy response_format field, and do not send stream, partial_images, or input_fidelity in direct Images edits.
cURL Single-Image Edit
curl -sS "https://api.xairouter.com/v1/images/edits" \
  -H "Authorization: Bearer $XAI_API_KEY" \
  -F "model=gpt-image-2" \
  -F "[email protected]" \
  -F "prompt=Keep the same assistant identity and pose, but make the lighting brighter and add subtle floating interface panels. No text, no logos, no watermark." \
  -F "size=1024x1024" \
  -F "quality=high" \
  -F "output_format=png" \
  | jq -r '.data[0].b64_json' | base64 -d > xai-assistant-edited.png
cURL Multiple Reference Images
curl -sS "https://api.xairouter.com/v1/images/edits" \
  -H "Authorization: Bearer $XAI_API_KEY" \
  -F "model=gpt-image-2" \
  -F "image[][email protected]" \
  -F "image[][email protected]" \
  -F "prompt=Create a new XAI assistant portrait using the first image as identity reference and the second image as lighting and color reference. No text, no logos, no watermark." \
  -F "size=1024x1024" \
  -F "quality=high" \
  -F "output_format=png" \
  | jq -r '.data[0].b64_json' | base64 -d > xai-assistant-reference-edit.png
Node.js Edit
import fs from "node:fs";
import OpenAI, { toFile } from "openai";

const client = new OpenAI({
  apiKey: process.env.XAI_API_KEY,
  baseURL: "https://api.xairouter.com/v1",
});

const source = await toFile(fs.createReadStream("source.png"), "source.png", {
  type: "image/png",
});

const result = await client.images.edit({
  model: "gpt-image-2",
  image: source,
  prompt:
    "Keep the same assistant identity and pose, but make the lighting brighter and add subtle floating interface panels. No text, no logos, no watermark.",
  size: "1024x1024",
  quality: "high",
  output_format: "png",
});

fs.writeFileSync(
  "xai-assistant-edited.png",
  Buffer.from(result.data[0].b64_json, "base64"),
);
Python Edit
import base64
import os
from openai import OpenAI

client = OpenAI(
    api_key=os.environ["XAI_API_KEY"],
    base_url="https://api.xairouter.com/v1",
)

with open("source.png", "rb") as image:
    result = client.images.edit(
        model="gpt-image-2",
        image=image,
        prompt="Keep the same assistant identity and pose, but make the lighting brighter and add subtle floating interface panels. No text, no logos, no watermark.",
        size="1024x1024",
        quality="high",
        output_format="png",
    )

with open("xai-assistant-edited.png", "wb") as f:
    f.write(base64.b64decode(result.data[0].b64_json))
For partial edits, add -F "[email protected]". The mask should match the first input image's dimensions and include an alpha channel, so PNG is recommended; each request currently accepts only one mask. Still describe the area to replace or preserve clearly in the prompt.
For streaming progress and partial images, use the Responses API image_generation tool below with stream:true.
Responses API: Minimal Request Body
If you only want to verify the API path, start with a small request body:
{
  "model": "gpt-5.5",
  "input": "Generate an elegant image of a glass AI studio with soft light.",
  "tools": [
    {
      "type": "image_generation",
      "model": "gpt-image-2",
      "size": "1024x1024"
    }
  ],
  "stream": true
}
Here, model: "gpt-5.5" is the main Responses API model. The image_generation tool handles the image generation step, and its model field selects gpt-image-2.
In production, we recommend keeping stream: true. The streamed response gives you progress events and the final image result in one connection, which makes it straightforward to extract base64 and save the image.
Responses API: Adapt the Official OpenAI Example
The official OpenAI JavaScript example is conceptually like this:
import OpenAI from "openai";

const openai = new OpenAI();

const response = await openai.responses.create({
  model: "gpt-5.5",
  input: "Generate an image of a premium AI workspace",
  tools: [{ type: "image_generation" }],
});
To run it through XAI Router, change two things:
- Read the API key from
process.env.XAI_API_KEY. - Set
baseURLtohttps://api.xairouter.com/v1.
If you also want to explicitly use gpt-image-2, set it inside the image_generation tool:
import fs from "node:fs";
import OpenAI from "openai";

const client = new OpenAI({
  apiKey: process.env.XAI_API_KEY,
  baseURL: "https://api.xairouter.com/v1",
});

const response = await client.responses.create({
  model: "gpt-5.5",
  input: "Generate an elegant image of a glass AI studio with soft light.",
  tools: [
    {
      type: "image_generation",
      model: "gpt-image-2",
      size: "1024x1024",
    },
  ],
});

const imageData = response.output
  .filter((output) => output.type === "image_generation_call")
  .map((output) => output.result);

if (imageData.length > 0) {
  fs.writeFileSync("xai-image.png", Buffer.from(imageData[0], "base64"));
}
This is the closest version to the official documentation flow. It works well for normal synchronous calls. If image generation takes longer, use the streaming version below.
cURL: Generate and Save a PNG
Set your API key first:
export XAI_API_KEY="your XAI API key"The script below calls gpt-5.5, lets it use the image_generation tool with gpt-image-2, and decodes the final base64 result into xai-generated-image.png.
out="xai-generated-image.png"

prompt='Create an elegant technical cover image: a refined glass AI studio, a luminous prompt console, and a generated image appearing as a softly glowing framed visual. No words, no logos, no watermark.'

body=$(jq -nc --arg prompt "$prompt" '{
  model: "gpt-5.5",
  input: $prompt,
  tools: [
    {
      type: "image_generation",
      model: "gpt-image-2",
      size: "1024x1024"
    }
  ],
  stream: true
}')

sse=$(mktemp)
b64=$(mktemp)
trap 'rm -f "$sse" "$b64"' EXIT

curl -sS -N --max-time 300 "https://api.xairouter.com/v1/responses" \
  -H "Authorization: Bearer $XAI_API_KEY" \
  -H "Content-Type: application/json" \
  --data-binary "$body" > "$sse"

awk '/^data: /{
  data=$0
  sub(/^data: /, "", data)
  if (data != "[DONE]") print data
}' "$sse" |
while IFS= read -r json; do
  jq -r '(.item.result? // .result? // empty)' 2>/dev/null <<< "$json"
done |
awk 'length($0) > max {max=length($0); best=$0} END {if (max > 0) print best}' > "$b64"

if [ ! -s "$b64" ]; then
  echo "No image result found."
  exit 1
fi

base64 -d "$b64" > "$out"
file "$out"
On success, you should see output like this:
xai-generated-image.png: PNG image data, 1024 x 1024, 8-bit/color RGB, non-interlacedThis script does three things:
- Uses
jqto build the JSON request body, which avoids shell quoting issues with long prompts. - Uses
curl -Nto receive the Server-Sent Events stream. - Extracts the base64 result from
image_generation_call.resultand decodes it into a PNG.
If you want to print progress, also print the event: lines while parsing SSE. Common events include:
response.created
response.in_progress
response.output_item.added
response.image_generation_call.generating
response.output_item.done
response.completed
Responses API: Node.js Example
If you use the OpenAI SDK in a Node.js project, point baseURL at XAI Router:
import fs from "node:fs";
import OpenAI from "openai";

const client = new OpenAI({
  apiKey: process.env.XAI_API_KEY,
  baseURL: "https://api.xairouter.com/v1",
});

const stream = await client.responses.create({
  model: "gpt-5.5",
  input:
    "Create an elegant technical cover image: a refined glass AI studio, a luminous prompt console, and a generated image appearing as a softly glowing framed visual. No words.",
  tools: [
    {
      type: "image_generation",
      model: "gpt-image-2",
      size: "1024x1024",
    },
  ],
  stream: true,
});

let imageBase64 = "";

for await (const event of stream) {
  if (event.type === "response.output_item.done") {
    const item = event.item;
    if (item?.type === "image_generation_call" && item.result) {
      imageBase64 = item.result;
    }
  }
}

if (!imageBase64) {
  throw new Error("No image result returned");
}

fs.writeFileSync("xai-generated-image.png", Buffer.from(imageBase64, "base64"));
The key event is response.output_item.done. When item.type is image_generation_call, item.result is usually the final base64 image content.
Responses API: Python Example
The Python version is the same idea: point the client to XAI Router.
import base64
import os
from openai import OpenAI

client = OpenAI(
    api_key=os.environ["XAI_API_KEY"],
    base_url="https://api.xairouter.com/v1",
)

response = client.responses.create(
    model="gpt-5.5",
    input="Generate an elegant image of a glass AI studio with soft light.",
    tools=[
        {
            "type": "image_generation",
            "model": "gpt-image-2",
            "size": "1024x1024",
        }
    ],
)

image_data = [
    output.result
    for output in response.output
    if output.type == "image_generation_call"
]

if image_data:
    with open("xai-generated-image.png", "wb") as f:
        f.write(base64.b64decode(image_data[0]))
For a web service, replace local file writing with an upload to object storage such as S3, R2, OSS, or your own CDN. Store only the image URL, prompt, model, size, and generation status in your database. Avoid writing large base64 payloads directly into business tables.
Responses API: Force the Image Tool
By default, the main model decides whether to call the tool based on the user's input. Most requests like "generate an image" will trigger image_generation, but if your product button is explicitly "Generate image", you can force the tool call with tool_choice:
{
  "model": "gpt-5.5",
  "input": "Draw an elegant AI product cover image.",
  "tools": [
    {
      "type": "image_generation",
      "model": "gpt-image-2",
      "size": "1024x1024"
    }
  ],
  "tool_choice": {
    "type": "image_generation"
  }
}
This is useful for background jobs, batch generation, and fixed UI actions. In open-ended chat, you can leave it out and let the model decide when an image is needed.
Responses API: Common Tool Options
Besides model, the image_generation tool can accept output options. Actual support depends on the current model and XAI Router behavior, but you can structure the request in the OpenAI-style shape:
{
  "type": "image_generation",
  "model": "gpt-image-2",
  "size": "1024x1024",
  "quality": "high",
  "output_format": "png"
}
Common options:
| Parameter | Purpose | Recommendation |
|---|---|---|
size | Output dimensions | Start with 1024x1024 for avatars and covers; use 3840x2160 for 4K landscape and 2160x3840 for 4K portrait |
quality | Rendering quality | Defaults to medium; use low for previews and high for final assets |
output_format | File format | Defaults to png; use png for lossless post-processing, or consider webp/jpeg for large web images |
output_compression | Compression level | Not set by default; set it only for JPEG/WebP workflows |
background | Background behavior | gpt-image-2 does not support background:"transparent" |
action | Generate or edit | Use generate for new images; keep auto for multi-turn context |
If you need transparent images, a practical workflow is to generate the subject on a clean solid background and remove it in post-processing. Do not request native transparency from gpt-image-2; if a future route exposes a transparency-capable image model, confirm the model and parameters separately.
Responses API: Streaming Partial Images
The OpenAI examples show that image generation can stream partial images before the final result. When XAI Router compatibility is available, add partial_images to the tool:
const stream = await client.responses.create({
  model: "gpt-5.5",
  input: "Draw an elegant AI studio with a generated image panel.",
  stream: true,
  tools: [
    {
      type: "image_generation",
      model: "gpt-image-2",
      size: "1024x1024",
      partial_images: 2,
    },
  ],
});

for await (const event of stream) {
  if (event.type === "response.image_generation_call.partial_image") {
    const imageBuffer = Buffer.from(event.partial_image_b64, "base64");
    fs.writeFileSync(`partial-${event.partial_image_index}.png`, imageBuffer);
  }

  if (event.type === "response.output_item.done") {
    const item = event.item;
    if (item?.type === "image_generation_call" && item.result) {
      fs.writeFileSync("final.png", Buffer.from(item.result, "base64"));
    }
  }
}
In a product UI, show the partial image first, then replace it with the final image. This reduces perceived latency and works well for image generation pages, creative tools, and chat-based design assistants.
Responses API: Why Use Streaming
Image generation usually takes longer than text generation. Although non-streaming Responses image generation returned a complete image in the live test, stream: true is more direct for scripts and backend services:
- You can observe progress events such as
response.image_generation_call.generating. - You can receive the final
image_generation_callin the same connection. - You do not need extra polling, task state management, or timeout recovery for a basic flow.
For a quick test, start with a short prompt and a 1024x1024 image. After the path is stable, add more detailed visual direction, brand constraints, and style requirements.
Prompting Tips
Image prompts do not need to be very long, but they should clearly define four things:
- Subject: what to generate, such as a technical cover, product image, or avatar.
- Composition: centered, waist-up, top-down, negative space, banner, or square.
- Style: photorealistic, semi-realistic, illustration, product render, editorial.
- Avoid list: no watermark, no text, no distorted hands, no low-quality artifacts.
Example:
Create an elegant technical cover image for an article about GPT-5.5 calling GPT Image 2 through an API router.
Show a refined glass AI studio, a luminous prompt console, and a generated image appearing as a softly glowing framed visual.
Square 1024x1024 composition, premium editorial look, graphite, ivory, soft teal and silver accents.
No words, no logos, no watermark, no clutter.
If you need accurate text inside the final image, be careful. Image models can generate text, but production typography is usually more reliable when handled by the frontend, a design tool, Canvas, or a post-processing script.
Product Patterns
This model-tool combination fits many common product features:
| Scenario | Typical input | Output |
|---|---|---|
| Blog cover generation | Article title, summary, style | Cover image |
| E-commerce assets | Product name, selling points, background preference | Product scene image |
| Character avatars | Persona, profession, clothing, expression | Avatar or character card |
| Ad creative | Campaign theme, brand colors, forbidden elements | Visual draft variants |
| Design assistant | Natural language user request | Image asset that can be saved and reused |
A reliable backend flow usually looks like this:
- Receive the user's input and visual constraints.
- Use
gpt-5.5to organize or enrich the image prompt. - Call
image_generationwithgpt-image-2. - Decode the base64 result into an image file.
- Upload it to object storage or a CDN.
- Return the image URL, model, size, prompt, and generation timestamp.
This is safer than putting generation logic directly in the browser. The API key stays private, timeouts are easier to manage, and failures can be logged and retried.
FAQ
Can I put gpt-image-2 in the Responses API model field?
No. The Responses API model field should be a text-capable mainline model such as gpt-5.5. gpt-image-2 is an image model. Put it inside the image_generation tool configuration.
If you call /v1/images/generations or /v1/images/edits, then the request-level model field should be gpt-image-2.
What if I need Chinese or English text inside the image?
Separate the text from the image when accuracy matters. Let the image model generate a clean background or main visual, then use frontend layout, Canvas, a design tool, or a post-processing script to place the final text. This gives you better control over typography, brand fonts, and responsive layouts.
Summary
To use gpt-image-2 through XAI Router, there are two stable patterns:
/v1/responses -> streaming image_generation workflow -> gpt-image-2
/v1/images/generations or /v1/images/edits -> non-streaming direct Images workflow -> gpt-image-2
The Responses API is useful when one multimodal workflow should understand the request, refine the prompt, choose a tool, generate an image, and stream progress or partial images. The Images API is best for OpenAI SDK compatibility and existing images.generate() / images.edit() code. The direct Images examples use non-streaming JSON and read image data from data[].b64_json.
References: