OpenAI Codex App Installation and Configuration Quickstart (macOS / Windows)
Posted March 4, 2026 by XAI Tech Team ‐ 6 min read
This guide is based on official OpenAI documentation and the current source code, and is designed to help general users install and configure Codex App as quickly as possible. All information was verified against official docs / source code on 2026-03-06.
Quick Summary (1 Minute)
- macOS: Download the
.dmgpackage and follow this guide's configuration steps to start using Codex App quickly. - Windows: Install from Microsoft Store. PowerShell works by default; if your workflow depends on Linux tooling, switch the Agent to WSL.
- Config file: On Windows Native, the default user config maps to
%USERPROFILE%\.codex\config.toml; after switching the Agent to WSL, use WSL's own~/.codex/config.toml. - Recommended flow: Configure your user-level
config.tomlandXAI_API_KEYfirst, then open your project and start. Use in-app sign-in only when a custom provider/key is not configured.
Official Support and Plans
According to the official Codex App docs:
- Codex App supports macOS (Apple Silicon) and Windows.
- ChatGPT Plus / Pro / Business / Edu / Enterprise plans include Codex capabilities.
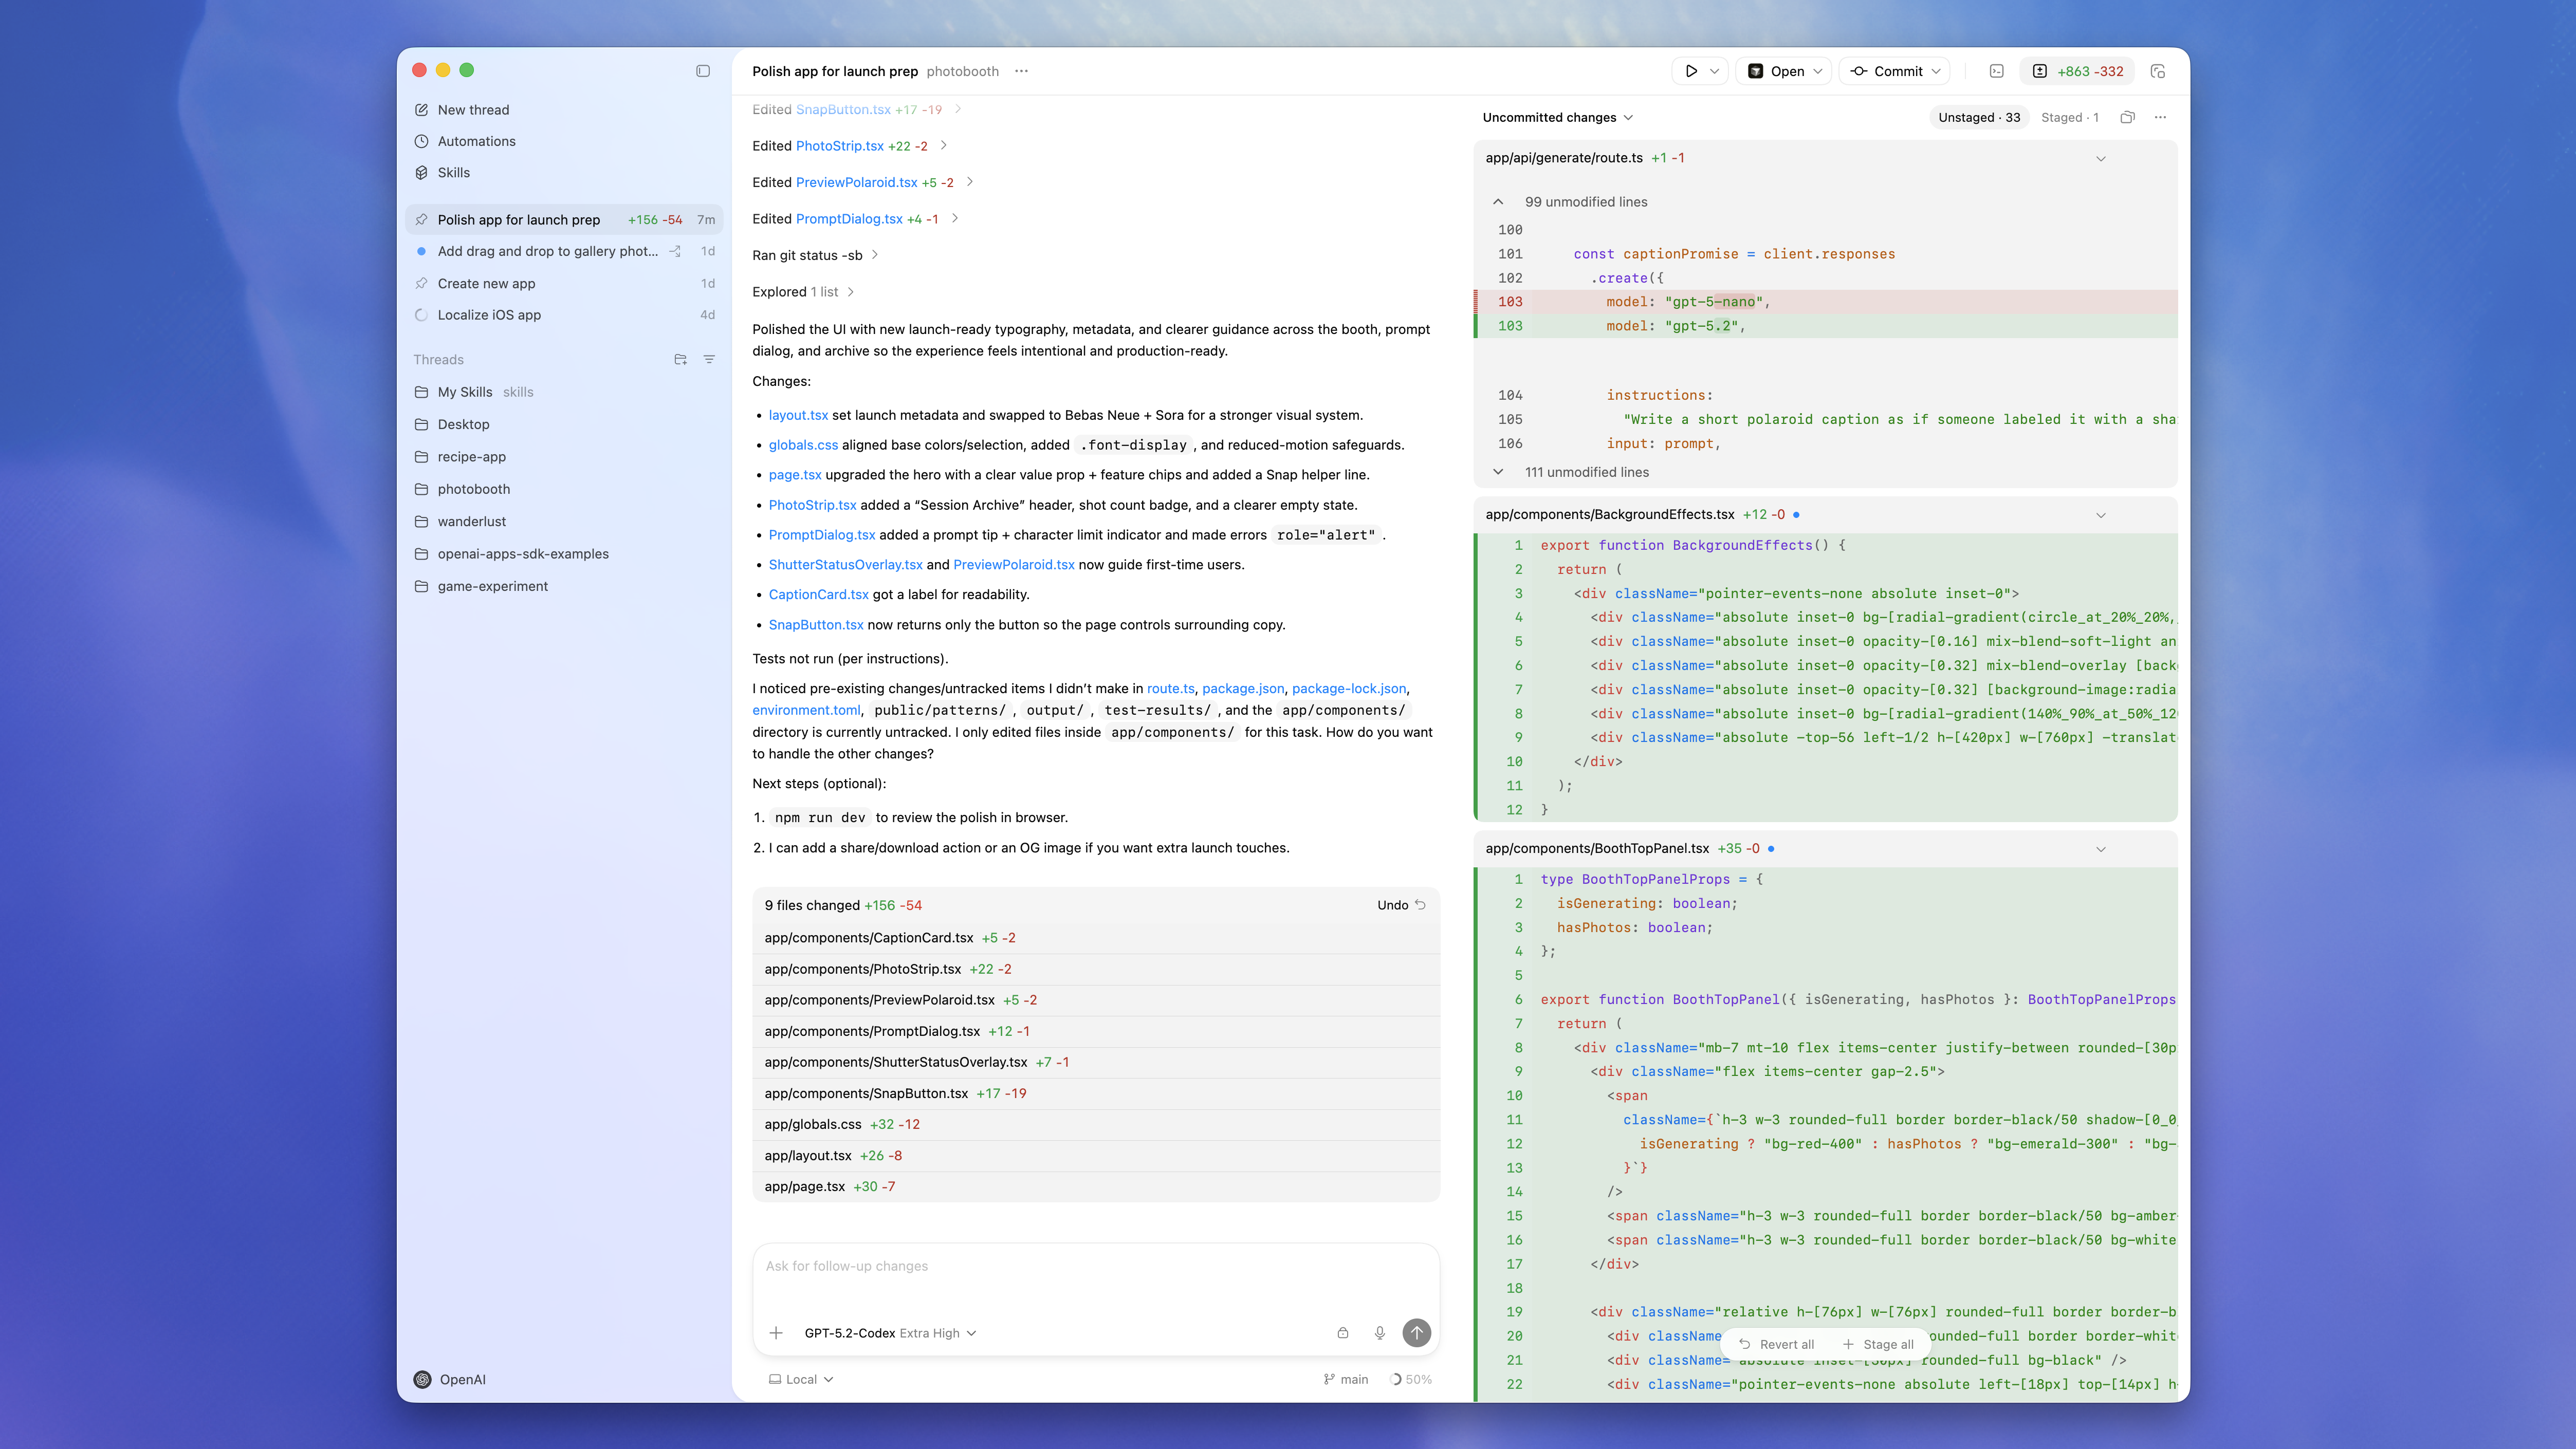
1) macOS Installation and First Use
1. Download and Install
Official macOS download link:
Open the downloaded file and drag Codex to Applications.
2. Open the App (Recommended: Use Config First)
If you have already configured ~/.codex/config.toml and set XAI_API_KEY, you can usually open a project and start directly without choosing an extra sign-in flow in the app.
If a custom provider/key is not configured, follow the official login flow with a ChatGPT account or an OpenAI API key.
3. Select a Project Folder
After launch, choose the code repository folder you want Codex to work on.
4. Send Your First Prompt
Keep the target in Local mode and start with tasks like:
- "Explain this repository structure."
- "Find likely issues and suggest fixes."
- "Add tests for this function."
2) Windows Installation and First Use
1. Install from Microsoft Store
Official Windows entry:
2. Update Method
The official recommendation is to update through Microsoft Store:
- Open Microsoft Store.
- Go to
Downloads. - Click
Check for updates.
3. Default Runtime Mode
On Windows, Codex App uses Windows Native Agent by default:
- Commands run in PowerShell by default.
- The app uses Windows sandboxing.
4. Switch to WSL (Optional, Recommended for Linux-Centric Workflows)
If your development setup relies on Linux tooling (for example bash, GNU tools, Linux Node/Python ecosystems), switch the Agent to WSL.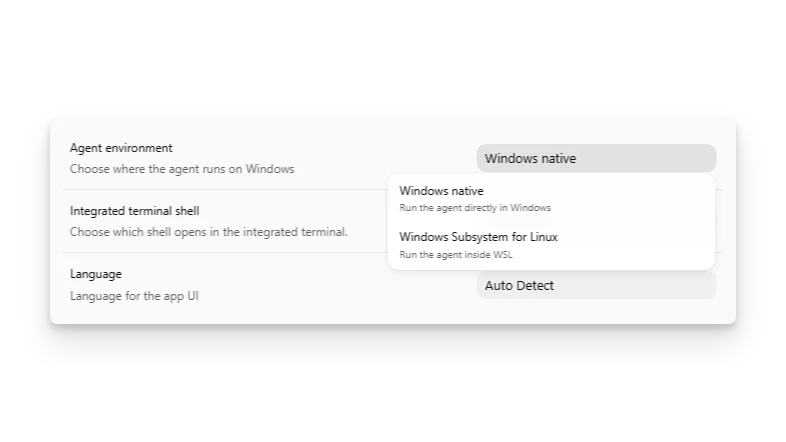
Path in the app (per official docs):
- Open
Settings. - Find the Agent runtime mode.
- Switch from Windows Native to WSL.
- Restart the app to apply changes.
Note: Agent runtime and integrated shell can be configured independently. You can run the Agent in WSL while keeping the shell in PowerShell, or vice versa.
3) Understand config.toml in 1 Minute
Official configuration basics:
- User-level config:
~/.codex/config.toml - Project-level config:
<project>/.codex/config.toml - Priority (high to low): CLI args > Profile > Project config > User config > System config > Built-in defaults
In practice: keep global defaults in your user-level config.toml, and override per project when needed.
Which config file should you edit on Windows?
This is the part that usually causes confusion.
The official docs often use the Unix-style shorthand ~/.codex/config.toml. Looking at the current Rust source, the actual meaning is: .codex/config.toml under the current user's home directory. The find_codex_home() helper uses the current user's home directory and appends .codex unless CODEX_HOME is set. So on Windows Native, the default location is not %APPDATA% — it is %USERPROFILE%\.codex\config.toml.
Use the following mapping:
- Windows Native Agent (default)
- User-level config:
%USERPROFILE%\.codex\config.toml - Project-level config:
<project>\.codex\config.toml - Example:
C:\Users\Alice\.codex\config.toml
- User-level config:
- WSL Agent
- User-level config:
~/.codex/config.tomlinside WSL - Example:
/home/alice/.codex/config.toml - Project-level config:
.codex/config.tomlinside the project as seen from WSL - If the repository lives on a Windows drive, a common path looks like:
/mnt/c/Users/Alice/work/myrepo/.codex/config.toml
- User-level config:
- When
CODEX_HOMEis set manually- The user-level config becomes
CODEX_HOME/config.toml - Example:
D:\codex-home\config.toml
- The user-level config becomes
Short version: edit the config.toml that belongs to the environment where the Agent is running.
Quick ways to open the config file on Windows
Windows Native (PowerShell)
New-Item -ItemType Directory -Force $HOME\.codex
notepad $HOME\.codex\config.toml
WSL
mkdir -p ~/.codex
nano ~/.codex/config.toml
4) Example Configuration (Ready to Reuse)
Here is a full reference example you can adapt as needed:
model_provider = "xai"
model = "gpt-5.4"
model_reasoning_effort = "xhigh"
plan_mode_reasoning_effort = "xhigh"
model_reasoning_summary = "none"
model_verbosity = "medium"
approval_policy = "never"
sandbox_mode = "danger-full-access"

[model_providers.xai]
name = "OpenAI"
base_url = "https://api.xairouter.com"
wire_api = "responses"
requires_openai_auth = false
env_key = "XAI_API_KEY"
Key Fields Explained
model_provider/model: Sets the default provider and model, unified here asxai + gpt-5.4.model_reasoning_effort/plan_mode_reasoning_effort: Keep a high reasoning level, whilemodel_reasoning_summary = "none"andmodel_verbosity = "medium"match the current manage-page recommendation.approval_policy/sandbox_mode: This is a high-permission setup—fast, but more permissive.[model_providers.xai]: Points Codex at XAI Router Responses;env_key = "XAI_API_KEY"means the real key still comes from the environment.
Security Recommendation (For General Users)
This example uses high-permission settings:
approval_policy = "never"sandbox_mode = "danger-full-access"
For safer defaults, use:
approval_policy = "on-request"
sandbox_mode = "workspace-write"
5) Environment Variable Setup (XAI_API_KEY)
Because the example uses:
env_key = "XAI_API_KEY"Your system needs XAI_API_KEY. This line does not store the secret itself; it only tells Codex which environment variable to read.
macOS / Linux
macOS uses zsh by default, so write to ~/.zshrc first:
echo 'export XAI_API_KEY="your_key"' >> ~/.zshrc
source ~/.zshrc
If you are on an older macOS release, or your terminal / IDE session still inherits a bash login environment, also mirror the variable into ~/.bash_profile; if that environment reads ~/.bashrc, add it there as well.
If you are on Linux with bash, use ~/.bashrc:
echo 'export XAI_API_KEY="your_key"' >> ~/.bashrc
source ~/.bashrc
Windows (PowerShell)
If the Agent runs in Windows Native, set the variable in PowerShell / the Windows user environment. If the Agent runs in WSL, it is best to also set the same variable inside WSL.
Current session:
$env:XAI_API_KEY = "your_key"Persist it for your user:
setx XAI_API_KEY "your_key"Reopen terminal/app after setting it.
6) Common GUI Settings
1. Default Open-In Editor
You can set a default editor in settings (VS Code / Visual Studio / others).
2. Integrated Shell
Common options on Windows: PowerShell, Command Prompt, Git Bash, WSL.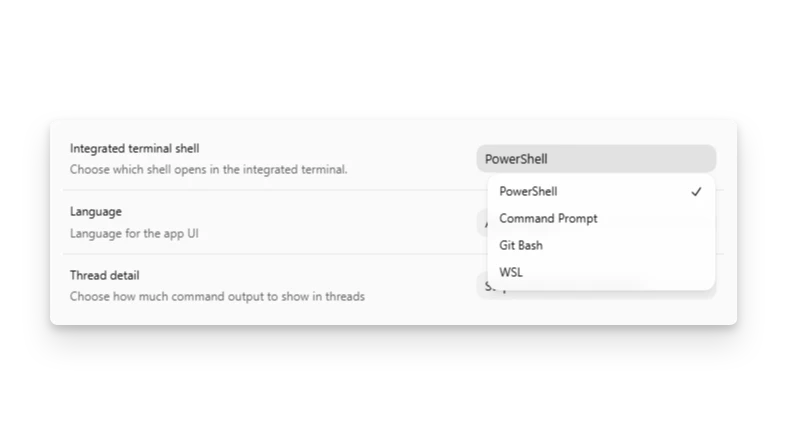
Note: Shell changes usually apply to new sessions. Restart the app if needed.
7) Quick Troubleshooting
1. PowerShell Execution Policy Error
A common fix from official docs:
Set-ExecutionPolicy -Scope CurrentUser RemoteSigned2. Git Not Available on Windows
Install native Git first:
winget install Git.Git3. Fast Environment Validation
Run these tasks in the app to confirm things are working:
- "Explain this repository structure."
- "Run a safe command and explain output (for example
git status)." - "Modify a small function and summarize the changes."
Official Docs and Download Links
- Codex App overview: https://developers.openai.com/codex/app/
- Windows page: https://developers.openai.com/codex/app/windows/
- App settings: https://developers.openai.com/codex/app/settings/
- Configuration basics: https://developers.openai.com/codex/config-basic
- Authentication and sign-in: https://developers.openai.com/codex/auth
- macOS download (official): https://persistent.oaistatic.com/codex-app-prod/Codex.dmg
- Windows download (official store): https://apps.microsoft.com/detail/9plm9xgg6vks?hl=en-US&gl=US